Gingival Barrier Gel: The Ultimate Gum‑Protection Guide for Safe, Painless Teeth Whitening (2025)
Why a Gingival Barrier Is Non‑Negotiable Above 20 % Peroxide
Chemical‑Burn Risk: What the ADA Says About High‑Peroxide Whitening Gels
Hydrogen peroxide is a powerful oxidizer, and the American Dental Association (ADA) warns that “peroxides are irritants and potentially caustic to soft tissues” when they contact unprotected gingiva. Regulations.gov Even routine in‑office bleaching can trigger temporary gum blanching or ulceration if the gel seeps under the gingival barrier. Colgate’s clinical guidance echoes this, noting that concentrated whiteners can “burn” gums and should only be used under professional supervision.
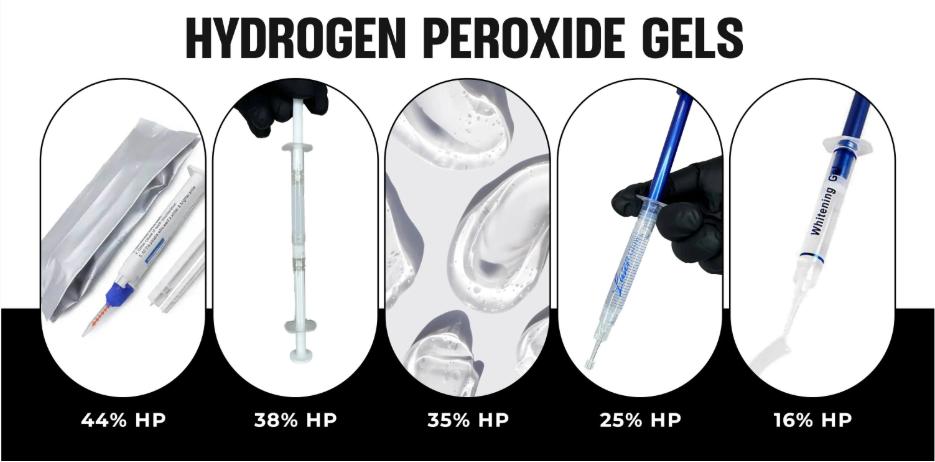
The ADA therefore recommends that patients consult a licensed dentist before using any bleaching product—especially those exceeding 20 % hydrogen peroxide. At 44 % H₂O₂, LaserGlow’s dual‑barrel gel delivers dramatic shade change in a single session, but it absolutely requires:
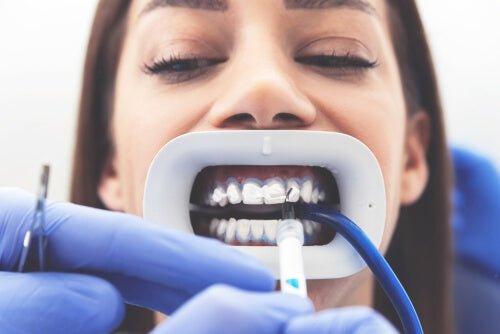
- A light‑cured gingival barrier (4 mm bead)
- Cheek retractors and eye protection
- Professional‑grade suction and post‑op fluoride
Used outside those safeguards, the gel can cause chemical burns within seconds.
Pro Tip for Clinicians: Always neutralize and rinse any accidental spill immediately, then apply a vitamin E swab to soothe the tissue.
Explore the product: LaserGlow 44 % Hydrogen Peroxide Whitening Gel → — engineered for chairside use only, never for take‑home kits.
What Exactly Is a “Gum Dam” (a.k.a. Gingival Barrier)?
Light‑Cured vs. Self‑Cured Gingival Barriers ― What’s the Difference?
Light‑cured resin barriers (sometimes marketed as gingival dams or gum protectors) are methacrylate‑based gels that remain fluid until they are exposed to a blue‐violet curing beam (≈ 405‑470 nm). Under an LED curing light—or the blue laser in a modern whitening lamp—the material polymerizes in 5–20 seconds, forming a rigid, rubbery wall you can peel away in one piece. Products in this category include LaserGlow’s Gingival Barrier (5‑second set).
Self‑cured (chemical‑set) barriers are two‑part acrylic or silicone resins that harden on their own after mixing. Because they rely on a redox reaction instead of light, they’re handy if your curing lamp is out of reach, but they need a 2‑ to 4‑minute working window before reaching full hardness, which can slow chairside workflow and increase the risk of material “slump” onto enamel. Enlightened SmilePMC
Laser‑Cured Speed: Where LaserGlow Shines
When you cure LaserGlow’s blue‑tinted barrier with either:
- a standard LED curing light, or
- the integrated diode/LED array on a professional whitening lamp,
Brand‑to‑Brand Snapshot Dentists Google Before Buying
| Feature | LaserGlow Gingival Barrier | Ultradent OpalDam | TheWhiteningStore Barrier | Generic Amazon/EBay Packs |
|---|---|---|---|---|
| Cure Type | Light/laser cured | Light cured | Light cured | Light cured or self‑cured options |
| Typical Cure Time | ≈ 5 s with LED/laser | 20 s with LED‑only | Up to 10 s | 10–60 s (light) or 3‑4 min (self‑cure) |
| Viscosity | Medium—won’t run | Medium | Thick | Varies (some runny) |
| Color | Bright blue for easy visibility | Mint‐green or white | Opaque white | Often clear or blue |
| Price (3 mL) | $12 | $15‑18 | $14 | $7‑12 |
| Peel‑Off Removal | One‑piece | One‑piece | One‑piece | May tear |
Data compiled from manufacturer pages and reseller listings
Bottom line: If speed and operator confidence are priorities, a light‑/laser‑cured resin like LaserGlow’s (≈ 5 s) outperforms both slower light‑cure competitors and even slower self‑cure formulas—while still giving you the clean, one‑piece removal clinicians love. For full specs—or to buy in bulk—visit the product page: LaserGlow Gingival Barrier – Gum Protector Syringe.
Step‑by‑Step Application With LaserGlow’s LED Curing Light
- Dry gingiva
- Trace a 4 mm bead
- Flash‑cure 5 s per quadrant with the LaserGlow LED Curing Light
- Check seal integrity under mirror magnification
Top 7 Mistakes Pros Make (and How to Avoid Them)
-
Under‑Curing the Barrier Gel → Lift‑Off & Leaks
Quick Fix: Scan each quadrant for 10 full seconds with a high‑intensity LED or laser. If the surface still looks glossy, add another 3 seconds—the cured gum dam should appear matte and rigid before peroxide touches it. -
Over‑Etching the Enamel → Resin Seepage onto Dentin
Quick Fix: Limit etch to 30 seconds max and rinse thoroughly. Dry the tooth, then inspect under magnification; a chalky‑white enamel sheen is ideal. Anything frosty beyond the CEJ invites the barrier gel to creep where it shouldn’t. -
Substituting Petroleum Jelly for a Resin Gum Protector (Outdated Hack)
Quick Fix: Ditch the Vaseline. It liquefies under heat lamps and offers zero chemical resistance. Upgrade to a light‑cured barrier gel that polymerizes into a peel‑able shield in seconds. -
Applying Too Thin a Bead—Micro‑Canals for Peroxide
Quick Fix: Lay a 4 mm‑wide, 1–1.5 mm‑high bead. Think “garden hose,” not “string.” A thin line may look neat but it can crack during curing, giving 44 % HP a direct route to the gingiva. -
Ignoring Interproximal Papillae
Quick Fix: Use a micro‑brush to chase the resin between each tooth before curing. Those tiny peaks are the first place peroxide seeps through if left unsealed. -
Curing in Large Segments Instead of Quadrants
Quick Fix: Flash‑cure anterior, left posterior, right posterior, and lingual surfaces separately. Smaller zones ensure even polymerization and reduce shrink stress that can tug the gum dam away from tissue. -
Skipping a Post‑Cure Seal Check
Quick Fix: After curing, run an explorer along the margin. If the tip slips under any section, add a tiny bit of resin and re‑cure. Two extra seconds now prevent 20 minutes of soft‑tissue first‑aid later.
Master these seven tweaks and your gingival gum protector will perform like a fortress—keeping caustic whitening gels exactly where they belong.
LaserGlow vs. Amazon & Generic Brands: Side‑by‑Side Comparison
| Feature | LaserGlow | Generic Amazon Pack | Opaldam |
|---|---|---|---|
| Cure Time | 5 s | 10 s | 10 s |
| Viscosity | Medium (flows, doesn’t run) | Thin | Thick |
| Price/3 mL | $12 | $14–18 | $16 |

