Non-invasive tooth gems for dental & esthetic pros
Learn how to apply tooth gems step-by-step, protect enamel, and choose the right dental-grade materials. Ideal for dentists, hygienists, whitening techs, and estheticians adding high-margin cosmetic services.
Medically reviewed by David Hanna, RDH
What are tooth gems?
A cosmetic, enamel-safe way to add sparkle to the smile using dental bonding techniques.
Tooth gems are tiny decorative crystals or jewels that are bonded to the enamel as a form of cosmetic body art. The procedure is completely non-invasive—no drilling, no injections, and no permanent alteration of tooth structure.
A dental-grade adhesive (such as composite resin) is applied to a clean, etched enamel surface. The gem is placed into the wet resin and cured with a blue LED light, very similar to how orthodontic brackets or composite fillings are bonded. When performed correctly, the application is painless, requires no anesthesia, and can be reversed without damaging healthy enamel.
LaserGlow supplies authentic premium crystal tooth gems and butterfly designs, along with complete professional tooth gem kits for clinics and trained tooth gem technicians.
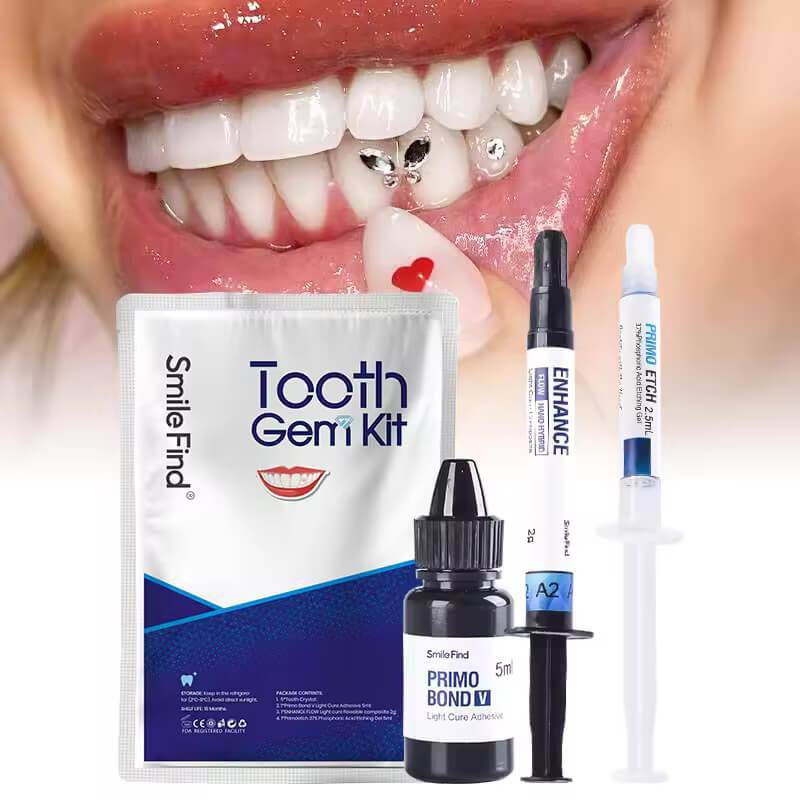
Inside a professional tooth gem kit
Every component is dental-grade and selected to support strong, predictable adhesion.
Etching gel
A mild phosphoric acid gel lightly etches the enamel surface, creating micro-roughness so resin can lock in. After 15–20 seconds, it is thoroughly rinsed away and the tooth is dried.
Bonding agent
A light-cured bonding resin penetrates etched enamel and forms a tacky, high-adhesion base. Using a quality dental bonding agent is critical for long-lasting results.
Dental adhesive / composite
Clear, light-curing orthodontic-style composite resin is used to secure the gem onto the tooth. Only dental-grade materials designed for intraoral use should be used.
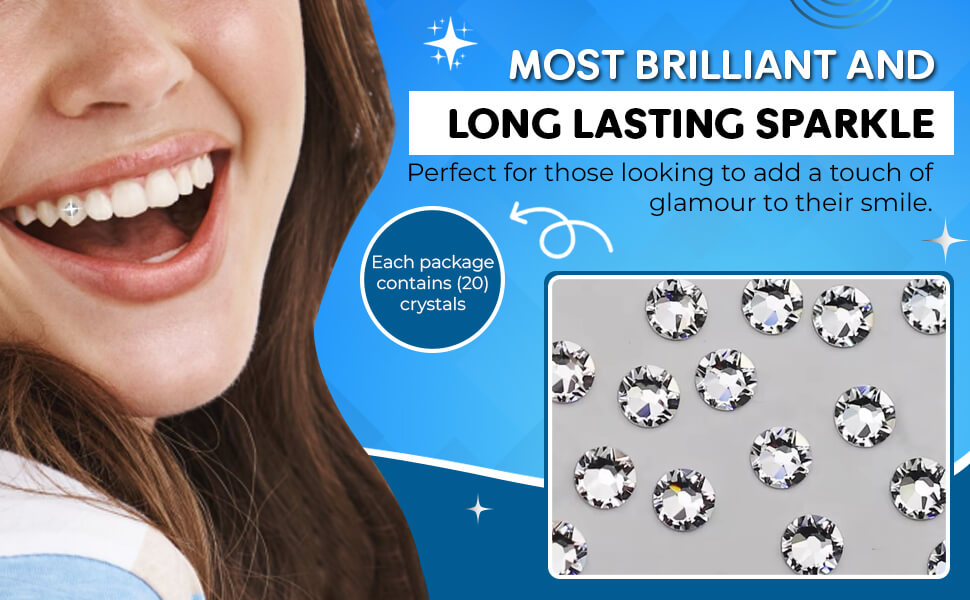
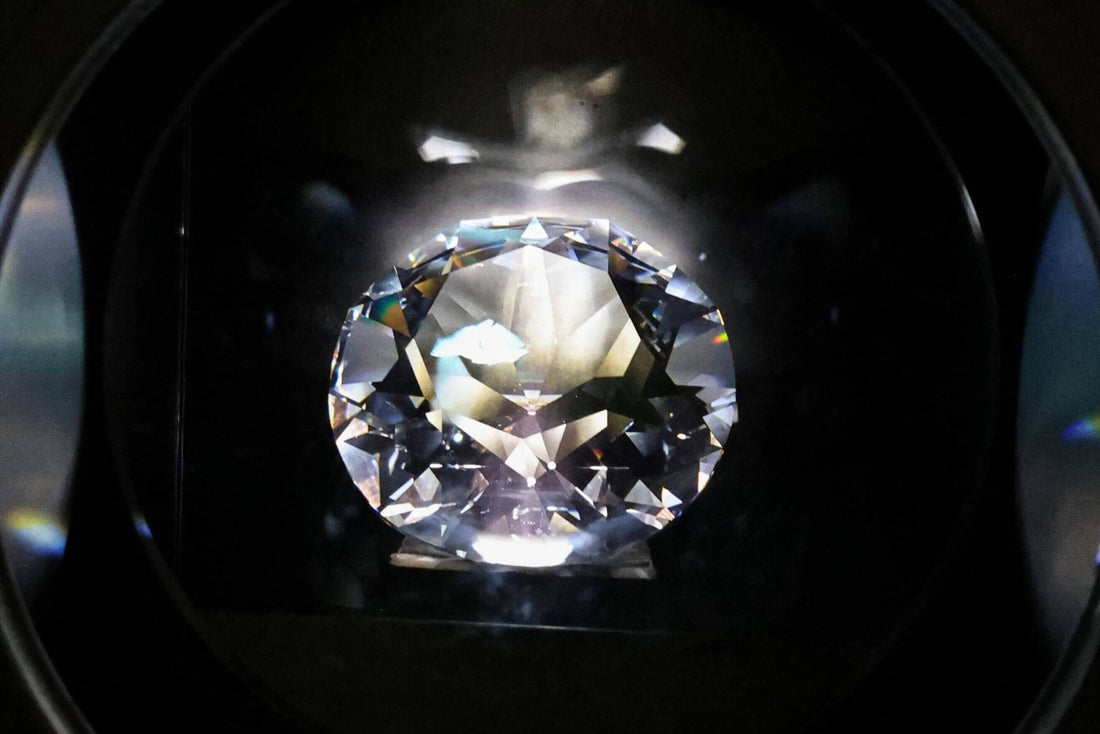
Tooth gems
High-brilliance crystals (often 1.8 mm or 2.2 mm) with reflective backings that catch light for maximum sparkle.
Shop crystal tooth gems →LED curing light
A high-intensity dental LED light quickly polymerizes the bond and composite under the gem, locking it in place within seconds.
LaserGlow LED Curing Light →Wax applicator tool
A wax-tipped applicator picks up and places tiny gems accurately without slipping, making it easier to center crystals on the tooth.
Tooth gem wax applicator →For an all-in-one solution, start with the LaserGlow Professional Tooth Gem Kit and browse our full Tooth Gem Kits & Supplies Collection.
Step-by-step tooth gem application
Follow this protocol using dental-grade materials and proper isolation for predictable results.
Have the patient brush and floss. Select the target tooth (often an upper incisor or canine). Use cotton rolls or a cheek retractor to keep the area fully dry throughout the procedure.
Apply a thin layer of etching gel to the chosen enamel surface for 15–20 seconds, following manufacturer guidelines. Rinse thoroughly and dry completely—proper etching creates micro-retention for the bond.
Place a small amount of bonding resin on the etched area and spread evenly with a microbrush. Light-cure with an LED curing light for 30–60 seconds to form a thin, well-bonded “glue” layer.
Use the wax applicator to pick up the gem by its flat back. Place it on the bonded surface and adjust until centered and aligned exactly where the patient wants it.
Cure with the LED light from several angles for 20–40 seconds total, making sure the light reaches the bond and composite under the gem. Confirm that no uncured resin remains.
Remove any residual wax and gently smooth excess composite if needed. Have the patient check their smile and confirm comfort—there should be no sharp edges or high spots.
Safety & best practices
The main risks come from poor materials and poor technique—not from the gem itself.
When tooth gems are applied with professional, dental-grade materials and correct technique, they can be a safe, enamel-friendly cosmetic service. The key is to respect enamel, avoid DIY glues, and maintain excellent hygiene around the gem.
Patients should understand that tooth gems are temporary and may need to be replaced or removed after 6–12 months. With informed consent and proper aftercare, the risk of enamel damage or plaque accumulation can be minimized.
For removal, use professional techniques and tools rather than force. Explore the dedicated Tooth Gem Removal Tool and read our full removal guide in the Tooth Gem Resource Center.
Aftercare & removal
Educate every client on how to protect their enamel and extend the life of their gem.
Aftercare instructions
- Avoid sticky or chewy foods for the first 24–48 hours.
- Do not pick at or bite directly on the gem.
- Brush gently with a soft-bristled toothbrush twice daily.
- Floss carefully around the tooth to prevent plaque buildup.
- Have the gem checked at regular dental visits.
Safe removal
If a client wants the gem removed, it should be done by a trained professional using a dental handpiece and polishing techniques to remove the adhesive while preserving enamel.
Avoid forcefully prying off the gem, which can chip enamel. A well-applied gem should come off with controlled mechanical polishing and finishing.
View tooth gem removal tool →Tooth gem FAQs
Answer common client questions directly during consultations or on your intake forms.
How long do tooth gems last? Tap to expand
Tooth gems typically last 6–12 months when applied with professional materials and maintained with good oral hygiene. Longevity depends on the patient’s diet, habits, and how carefully they follow aftercare instructions.
Will a tooth gem damage my enamel? Tap to expand
When applied and removed correctly by a professional using dental-grade products, tooth gems should not damage enamel. DIY kits, non-dental glues, or aggressive removal methods can cause scratches, irritation, or enamel loss.
Can I brush my teeth with a tooth gem? Tap to expand
Yes. Patients should continue brushing twice daily with a soft-bristled toothbrush. They should avoid scrubbing aggressively over the gem and keep the surrounding area very clean to prevent plaque buildup.
What if the tooth gem falls off? Tap to expand
If a gem falls off prematurely, it can usually be reapplied by a professional. Clients should avoid attempting to re-glue it themselves with non-dental adhesives, as this can damage enamel or irritate gums.
Can I remove a tooth gem at home? Tap to expand
Home removal is not recommended. Safe removal should be performed by a dental professional or trained tooth gem technician using controlled polishing to remove adhesive without harming enamel.
Is the procedure painful? Tap to expand
No. Tooth gem application is non-invasive and does not require drilling or anesthesia. Patients may feel slight pressure during placement, but the procedure is generally quick and comfortable.
Are there any side effects? Tap to expand
Side effects are rare when proper materials and technique are used. The main concerns are plaque accumulation around the gem or mild gum irritation if adhesive touches soft tissue. Good hygiene and correct placement significantly reduce these risks.
Build a complete tooth gem service menu
Combine professional training, high-quality supplies, and clear aftercare handouts to add a profitable, in-demand cosmetic service to your practice.