A cordless water flosser can make interdental cleaning more practical for people who find string floss difficult to use consistently. This guide explains setup, pressure selection, technique and maintenance, with clinical review by a Registered Dental Hygienist.

- Water Flosser vs. Traditional Flossing
- What You Get: LaserGlow Cordless Water Flosser Specs
- How to Set Up Your Water Flosser
- The 5 Cleaning Modes Explained
- Step-by-Step Flossing Technique
- Should You Brush First or Floss First?
- Who Benefits Most from Water Flossing?
- Cleaning and Maintenance
- Frequently Asked Questions
Water Flosser vs. Traditional Flossing: What's the Real Difference?
Traditional string floss removes plaque through friction — scraping the tooth surface between contacts with a C-shaped wrapping motion. Done correctly, it works. The problem is that most people don't do it correctly. Survey data on daily flossing habits in the U.S. has consistently hovered under 40% for years.
A water flosser — also called an oral irrigator — takes a different mechanical approach. A pressurized, pulsating stream of water flushes bacteria, food debris, and loose plaque out of the interproximal spaces and from the gingival sulcus: the 1–3mm pocket between your gum and tooth where most periodontal disease originates.

Five cleaning modes and four interchangeable nozzle tips — designed for every patient profile.
| Factor | String Floss | Cordless Water Flosser |
|---|---|---|
| Plaque removal (perfect technique) | High | Moderate–high |
| Real-world plaque removal (typical user) | Low–moderate | High |
| Gingival sulcus flushing | Minimal | Strong — pulsating flush |
| Gum stimulation | Low | High — promotes circulation |
| Bleeding reduction | Moderate | Strong — especially for gingivitis |
| Braces / implants / bridges | Difficult — requires threader | Fast and effective |
| Daily compliance | ~40% | Consistently higher |
| ADA accepted | Yes | Yes |
Both methods can support interdental cleaning and may be used together. The best option is one you can use correctly and consistently, based on your oral-health needs and guidance from your dental professional.
"String floss can clean contact surfaces precisely when used with the correct C-shape technique. A water flosser may be more practical for some people, especially around braces or appliances. Consistent, correct use matters more than choosing a tool from marketing claims alone."
What You Get: LaserGlow Cordless Water Flosser

The LaserGlow Cordless Water Flosser — 300ml tank, 360° rotatable nozzle, IPX7 rated for shower use.
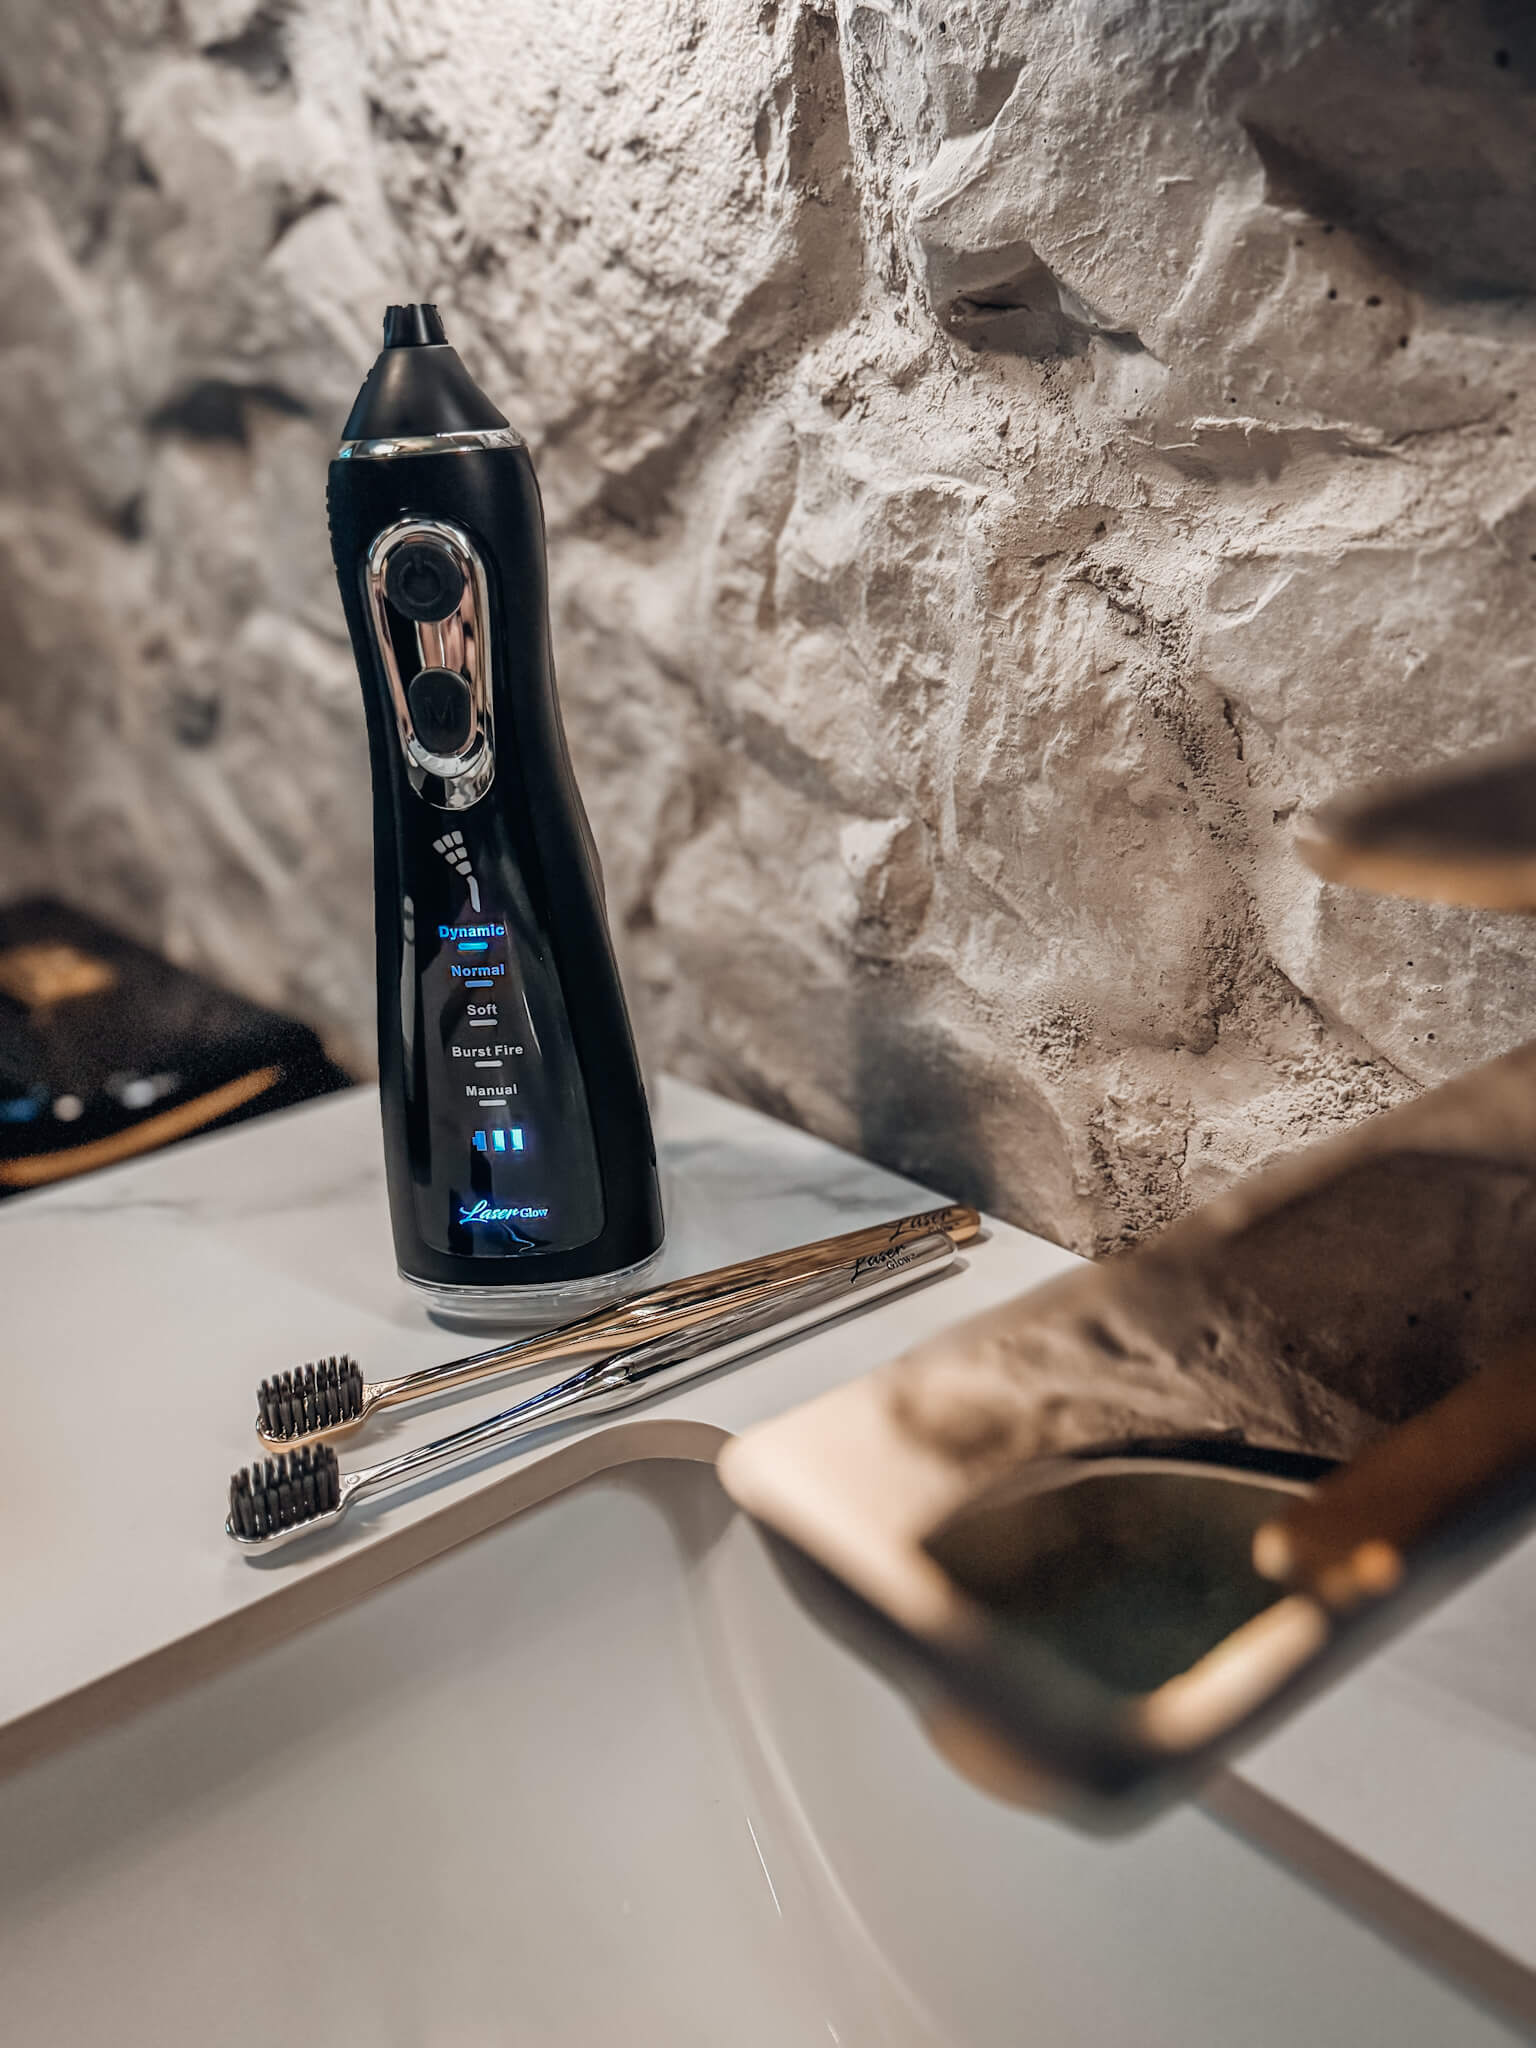
The LaserGlow Cordless Water Flosser is a professional-grade cordless oral irrigator designed for daily use at home. Every detail in the feature set is aimed at removing the friction that causes people to skip oral hygiene:
Four interchangeable nozzle tips let you customize the cleaning approach — a standard jet tip for everyday use, a periodontal tip for deeper gumline cleaning, an orthodontic tip for braces, and a tongue scraper tip. The 360° rotating nozzle head is worth calling out specifically: reaching the lingual (tongue-side) surface of upper back molars without contorting your wrist is one of the most common reasons people under-clean that area. Rotating head solves it.
The 300ml water reservoir holds enough for a complete session without needing to refill. The rechargeable battery lasts up to 50 days on daily sessions — so this doesn't become another device you're perpetually searching for a charger for.
How to Set Up Your Water Flosser for the First Time
Setup is genuinely simple, but a few details determine whether your first session goes smoothly or puts you off the habit entirely. Cover these before you put the nozzle anywhere near your mouth:
-
Charge fully before first use. Connect via the included USB-C cable and charge until the indicator shows full. A first charge takes approximately 2–3 hours. The battery will then last up to 50 days of daily use.
-
Fill the reservoir with lukewarm water. Open the tank lid and fill to the maximum fill line — do not overfill. Lukewarm water matters. Cold water can trigger sensitivity, especially during the first few sessions. Do not use hot water.
-
Attach your nozzle until it clicks. Align the nozzle stem with the unit port and push firmly until you hear or feel the click. A loose nozzle leaks. For first-time use, start with the standard jet tip.
-
Test over the sink before using in your mouth. Run the flosser over the sink for 2–3 seconds to prime the pump and confirm the reservoir connection isn't leaking. This also primes the nozzle so you don't get a dry pulse when you start.
-
Select Soft or Normal mode for your first session. Resist the urge to start on the highest setting. Your gums aren't conditioned for high-pressure water yet. Start on Soft for the first several sessions, then work up. Gums that feel tender in the beginning will tighten and become more resilient with consistent daily use.
The 5 Cleaning Modes Explained
Not all water flosser sessions are the same. The LaserGlow Cordless Water Flosser has five distinct modes, each with a specific mechanical action and clinical use case:
| Mode | Pressure Type | Best For |
|---|---|---|
| Soft | Gentle pulsation | First-time users; sensitive or inflamed gums; post-treatment recovery; braces wearers beginning water flossing |
| Normal | Steady stream | Everyday plaque removal and gum care; primary daily mode for most users |
| Dynamic | Auto-cycling intensity | Automatically cycles between intensities for an all-around clean; a good default once your gums are conditioned |
| Burst Fire | Targeted pulses | Loosening debris around braces and implants; stubborn debris between crowded teeth |
| Manual | User-controlled | Full control of water pressure from start to stop; experienced users with specific cleaning needs |
"Start at the lowest comfortable setting and increase only as tolerated and permitted by the device instructions. High pressure is not automatically more effective, and unexpected pain or persistent bleeding should be discussed with a dental professional."
How to Use a Water Flosser: Step-by-Step Technique
Every generic water flosser guide covers setup and stops there. Technique — specifically where you aim the nozzle, how long you pause at each tooth, and which surfaces you're probably skipping — is what determines whether your gum health actually improves. Here's the correct protocol:

IPX7 waterproof — use in the shower or over the sink without concern.
-
Get into position before turning it on. Lean forward over the sink. Position yourself before powering the device on — especially in the first few sessions. Water will spray. You will not be prepared. Now you will be.
-
Place the nozzle in your mouth, then turn on. Not the other way around. Place the tip at your back gumline, close your lips enough to control splash, then press the button. Reversing this step is the universal water flosser beginner mistake.
-
Start at the buccal surface of your upper back molars. Upper second and third molars — the cheek-facing side. This is where calculus accumulates fastest in most patients, and where most people either rush or skip entirely. Start here, every time.
-
Aim the nozzle at 90° to the gumline — not at the tooth. The goal is to flush the gingival sulcus. Angling toward the tooth surface wastes water pressure. Angle directly at the junction between your tooth and gum tissue. This is where bacteria colonize.
-
Pause 1–2 seconds at each interproximal space. Move deliberately from tooth to tooth. Pausing at each contact point gives the pulsating water time to flush through and beneath the contact area. Don't rush — the full session is only 60–90 seconds total.
-
Work all four quadrants, including lingual surfaces. Upper right → upper left → lower left → lower right. Include both the buccal and lingual (tongue-side) surfaces of each quadrant. The backs of your lower front teeth are where most patients accumulate calculus heaviest — and where they never clean properly.
-
Empty the reservoir completely after every session. Standing water in the tank grows bacteria. Empty, rinse with clean water, and leave the cap open to air dry. Takes 15 seconds. Do it every time.
Total time: 60–90 seconds when done correctly. Water flossing is faster than string flossing — there's no excuse left.
Should You Brush First or Use Your Water Flosser First?
Either order can work.
Use the order that makes it easiest to clean thoroughly every day. Some people prefer water flossing first to clear debris before brushing; others brush first and use the water flosser afterward. Do not skip fluoride toothpaste or treat the device as a substitute for brushing.
When you irrigate first, you flush loose food particles and bacteria out of the interproximal spaces and gingival sulcus. When you brush immediately after — with fluoride toothpaste — the fluoride penetrates into those now-cleaner spaces and contacts the tooth structure more directly. Fluoride retention in the interproximal areas improves.
Research on sequencing has focused largely on string floss and does not establish one mandatory order for every water-flosser user. Technique, consistency and following the device instructions matter more than presenting one sequence as universal.
"Use the order you can perform thoroughly and consistently. Water flossing can fit before or after brushing, but it does not replace twice-daily brushing with fluoride toothpaste."
Who Benefits Most from Water Flossing?
A water flosser isn't just a convenience upgrade over string floss. For specific patient profiles, it's meaningfully more effective — and in some cases, it's the only practical daily cleaning method available.

Consistent daily water flossing — the fastest path to measurably healthier gums between dental appointments.
Cleans around brackets and under arch wires without threading floss through hardware. Highly recommended by orthodontists. Use the jet tip or the orthodontic tip.
The peri-implant sulcus is particularly vulnerable to biofilm accumulation. A water flosser cleans around the implant post and crown without damaging the tissue interface.
Cleaning under a pontic with string floss requires a floss threader and patience. A water flosser flushes under the bridge pontic in seconds.
A water flosser can help remove debris and plaque around the gumline and may support gum-health measures when used consistently. It complements brushing and professional dental care; it does not replace either one.
Arthritic hands, limited mobility, or difficulty handling string floss — a water flosser removes the dexterity barrier. One-handed operation, no complicated coordination required.
Cleans effectively around partial denture clasps and under denture bases. Reaches areas that manual brushing may miss.
How to Clean and Maintain Your Cordless Water Flosser
Proper maintenance keeps your unit hygienic, extends its lifespan, and ensures it performs consistently. The routine is minimal — most of it takes under a minute.
- Empty remaining water from the reservoir
- Rinse the tank with clean water
- Leave the cap open to air dry
- Power off and store upright
- Detach nozzle tip and rinse under warm running water
- Wipe down the unit exterior with a damp cloth
- Check the nozzle for debris accumulation
- Run a 50/50 white vinegar and water solution through the reservoir to descale
- Inspect the nozzle tip and replace it if deformed or degraded
- Flush the descaling solution fully before the next use
- IPX7 rated and suitable for shower use
- Do not submerge the USB-C charging port
- Recharge when the battery indicator shows low
- Replace nozzle tips every 3–6 months
Frequently Asked Questions About Water Flossers
What is a water flosser and how does it work?
How often should you use a water flosser?
Is a water flosser better than regular flossing?
Should I brush first or use my water flosser first?
Can I use a water flosser with braces?
How long does the LaserGlow water flosser battery last?
Is the LaserGlow water flosser waterproof?
Will using a water flosser make my gums bleed?
Ready to Upgrade Your Routine?
5 cleaning modes. 4 nozzle tips. 50-day battery. IPX7 waterproof.
Shop the Water Flosser →