Teeth Whitening & Tooth Gem Blog | Expert Guides | LaserGlow


How Do Tooth Gems Stay On? The Bonding Process Explained
Tooth gems stay on through a four-step dental bonding process: clean and isolate, etch the enamel, apply bonding agent and adhesive, and cure with an LED light. Here's exactly how it works and what causes early failures.
Learn more
How to Whiten Teeth Fast Before an Event: 24-Hour, 72-Hour & 7-Day Plan
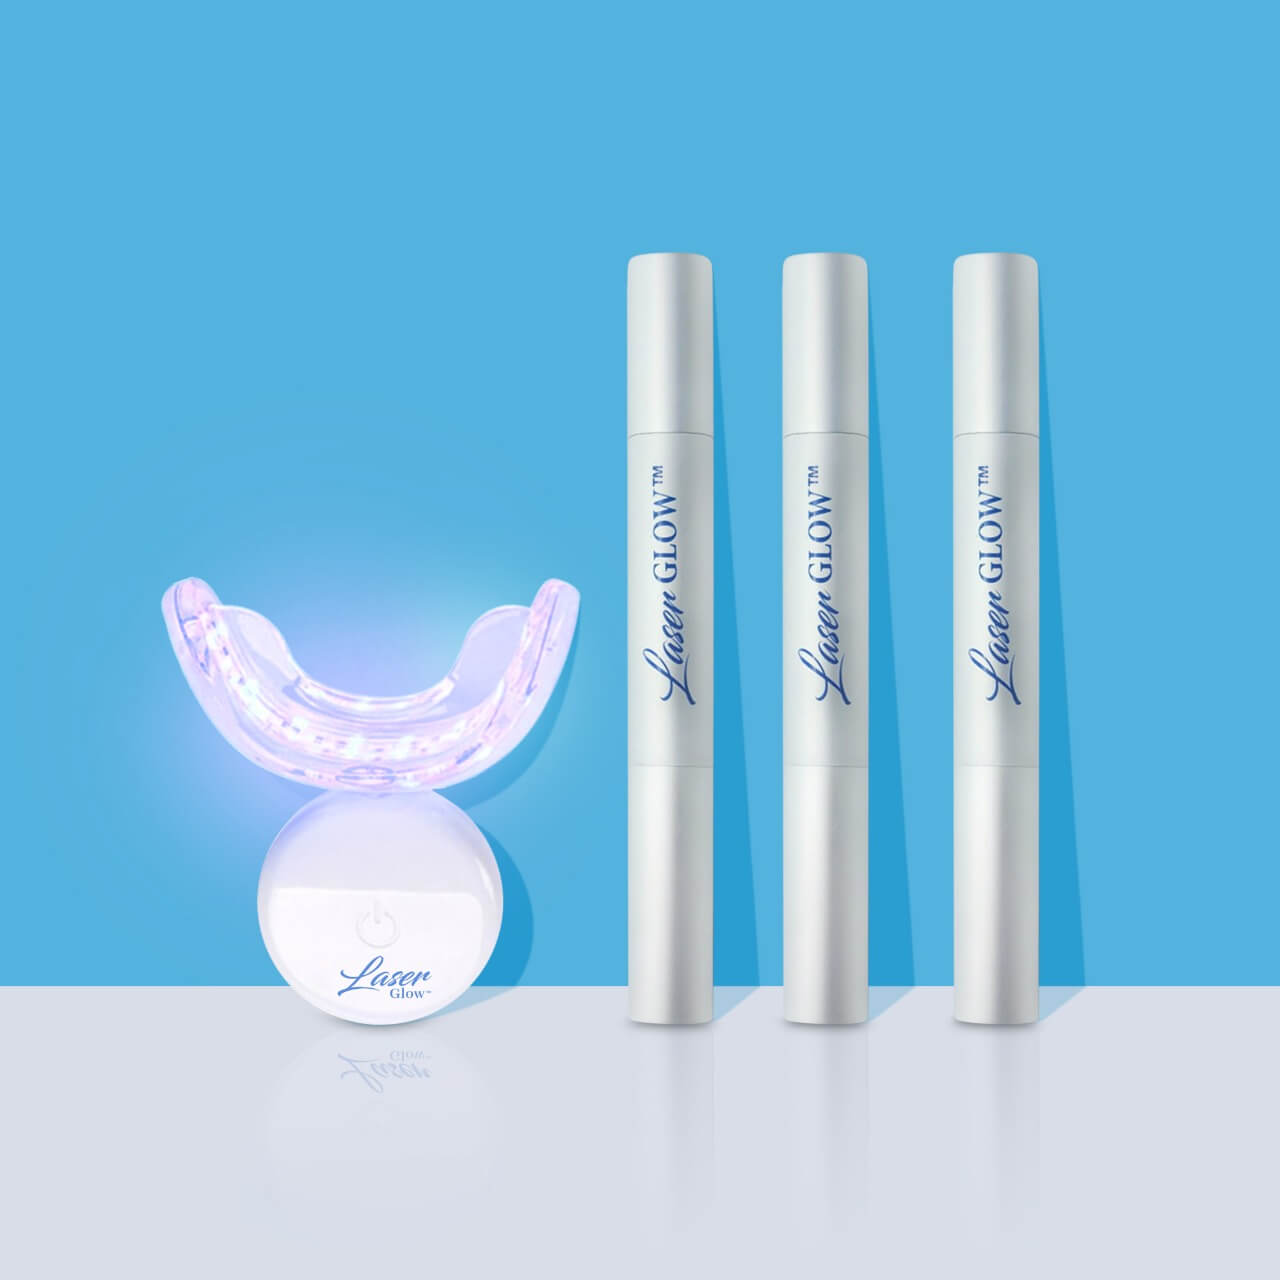
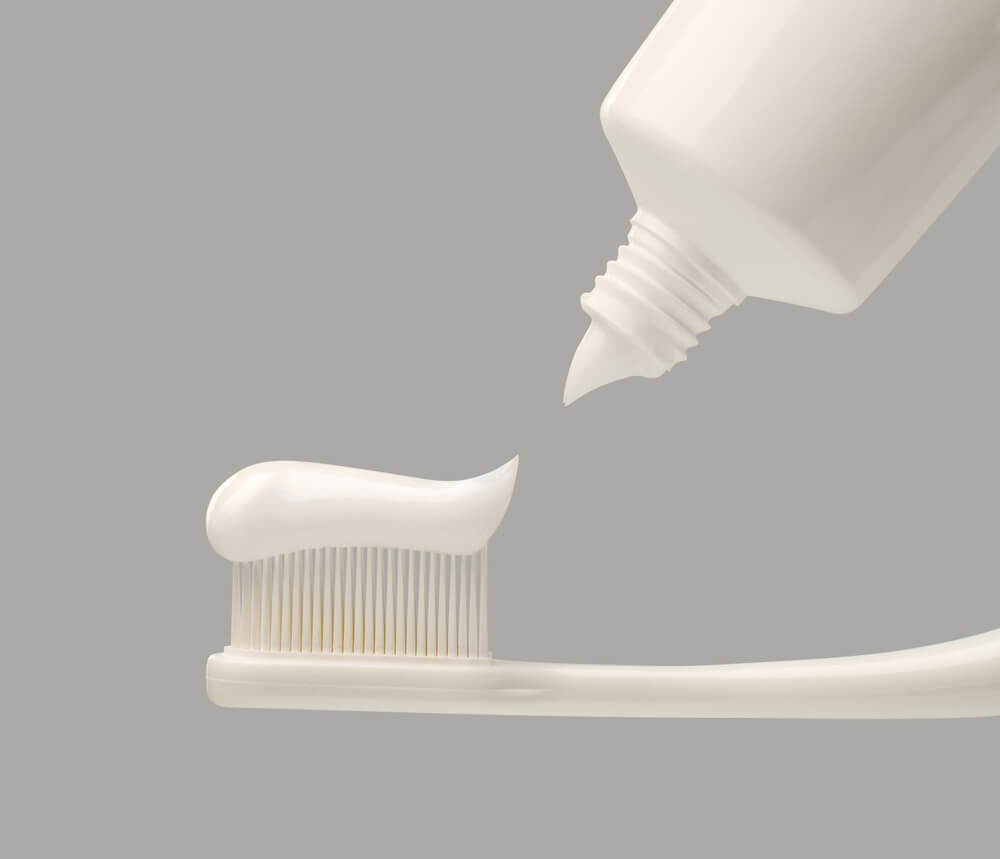
Event Whitening Guide How to Whiten Teeth Fast Before an Event: 24-Hour, 72-Hour & 7-Day Plan Need a brighter smile before a wedding, party, photoshoot, date, graduation, or big event? The fastest safe approach depends on how much time you have. Use purple toothpaste serum for instant optical brightness, whitening strips or an LED kit for deeper whitening, and smart stain-control habits so your smile looks clean, bright, and photo-ready. Reviewed by: David Hanna, RDH · Updated: February 16, 2026 Shop Purple Toothpaste Serum Shop LED Whitening Kit Fast whitening should still be safe whitening. Avoid harsh DIY hacks, overusing peroxide, or scrubbing your enamel like it owes you money. The Fast Answer: What Works Before an Event? If you have 24 hours, focus on instant visual brightness: floss, avoid staining foods, and use LaserGlow Purple Toothpaste Serum to help neutralize yellow tones before photos. If you have 72 hours, add a short whitening routine such as whitening strips or an LED whitening session, then finish with purple color correction on the day of the event. If you have 7 days or more, use a consistent whitening plan with strips or an LED kit, then maintain the brighter look with purple toothpaste serum as your final step. Choose Your Whitening Plan by Timeline 24 Hours Best for instant brightness, yellow-tone correction, and photo-ready polish. 72 Hours Best for quick whitening boost plus event-day color correction. 7 Days Best for visible whitening results with less panic and fewer bad decisions. 2 Weeks Best for the most controlled, gradual, lower-stress whitening routine. 24-Hour Teeth Whitening Plan With only one day before your event, do not try aggressive whitening. Your goal is to make teeth look brighter without causing last-minute sensitivity or gum irritation. Nobody wants to arrive at a wedding smiling like cold air is attacking them. Morning Brush normally, floss carefully, and rinse thoroughly. Avoid coffee, tea, red wine, dark sauces, berries, and anything that can stain right before the event. Afternoon Drink water after meals and snacks. If you drink coffee or tea, use a straw when possible and rinse with water afterward. Before Photos or the Event Use LaserGlow Purple Toothpaste Serum as your final cosmetic brightening step. It helps neutralize yellow tones through violet color correction so teeth look cooler and brighter right away. 72-Hour Teeth Whitening Plan If you have three days, you can combine light whitening with instant color correction. This gives you more visible improvement than a same-day routine without overdoing it. Night 1 Use whitening strips or one LED whitening session, depending on your preferred routine and sensitivity level. Night 2 Repeat your whitening step if your teeth feel comfortable. Skip if you feel sensitivity. Night 3 Do one final whitening session or keep it simple with stain-control habits. Event Day Use purple toothpaste serum before photos for instant yellow-tone correction. For a 72-hour routine, consider LaserGlow Whitening Strips or the LaserGlow Wireless LED Teeth Whitening Kit, then use purple toothpaste serum as the finishing step. 7-Day Teeth Whitening Plan A full week gives you enough time to build a real whitening routine while keeping sensitivity under control. This is the best plan if you want visible whitening before an event without rushing into chaos, mankind’s favorite planning method. Day Morning Night Goal Day 7 Brush and floss normally Start whitening strips or LED whitening kit Begin stain lifting Day 6 Use purple toothpaste serum if desired Continue whitening routine Build consistency Day 5 Avoid coffee, tea, and dark sauces when possible Continue whitening if comfortable Reduce new staining Day 4 Brush, floss, rinse after meals Pause if sensitivity starts Protect comfort Day 3 Use purple toothpaste serum for tone correction Final whitening session if comfortable Boost brightness Day 2 Focus on stain-free eating and hydration Skip strong whitening if sensitive Maintain results Event Day Floss, rinse, and use purple toothpaste serum No aggressive whitening right before the event Photo-ready finish 2-Week Teeth Whitening Plan If you have two weeks, you have the best chance to whiten gradually and avoid sensitivity. Use a whitening kit or strips consistently, but follow the product directions and take breaks if your teeth feel sensitive. The final 48 hours should focus on maintenance: avoid staining foods and drinks, keep up with flossing, and use purple toothpaste serum for instant yellow-tone correction before photos. Best LaserGlow Products for Fast Event Whitening Purple Toothpaste Serum Best for instant optical brightness and yellow-tone correction before photos or events. Shop Purple Toothpaste Serum Wireless LED Whitening Kit Best for a stronger at-home whitening routine when you have several days to prepare. Shop LED Whitening Kit Whitening Strips Best for simple at-home whitening over a short routine before a wedding, party, or trip. Shop Whitening Strips PAP+ Whitening Pen Best for quick touch-ups and portable brightening when you want a simple brush-on option. Shop PAP+ Whitening Pen What Not to Do Before an Event Do not try random DIY whitening hacks right before an event. Skip apple cider vinegar, lemon juice, aggressive baking soda scrubs, charcoal powders, and doubling up on whitening products in one day. These shortcuts can irritate gums, trigger sensitivity, or make enamel feel rough. The day before an event is not the time to run a chemistry experiment in your mouth. Shocking that this needs saying, yet here we are. At-Home Whitening vs Professional Whitening Before an Event Professional whitening can create faster shade change, but it may cost more and can cause temporary sensitivity. At-home whitening gives you more control, especially if you have several days or weeks before the event. If you need a quick visual boost, purple toothpaste serum is the safest event-day finisher. If you want deeper whitening, use strips or an LED kit in the days leading up to the event, not minutes before walking out the door. Event-Day Smile Checklist Floss First Remove food and plaque between teeth so your smile looks clean up close. Rinse After Meals Water helps reduce fresh staining from coffee, tea, sauces, and snacks. Use Purple Toothpaste Serum Apply before photos or the event to help neutralize yellow tones instantly. Avoid Last-Minute Over-Whitening Do not stack multiple peroxide treatments right before the event. Final Verdict The fastest safe way to whiten teeth before an event is to match the routine to your timeline. For 24 hours, focus on purple color correction and stain control. For 72 hours, add a short whitening routine. For 7 days or more, use whitening strips or an LED kit consistently, then finish with purple toothpaste serum on event day. Start here: LaserGlow Purple Toothpaste Serum, LaserGlow Whitening Strips, or the LaserGlow Wireless LED Whitening Kit. FAQs How can I whiten my teeth fast before an event? For the fastest safe improvement, floss, avoid staining foods and drinks, use whitening strips or an LED whitening kit if you have a few days, and use purple toothpaste serum before photos to help neutralize yellow tones instantly. Can I whiten my teeth in 24 hours? You can make teeth look brighter in 24 hours, especially with cleaning, stain control, and purple toothpaste serum. True shade change usually takes longer and typically requires peroxide whitening products or professional treatment. What is the best last-minute teeth whitening product? For last-minute visual brightness, purple toothpaste serum is one of the best options because it helps neutralize yellow tones instantly without peroxide. For deeper whitening, use strips or an LED kit if you have several days. Should I whiten my teeth the day before a wedding? Avoid aggressive whitening the day before a wedding if you are sensitive. Use gentle stain control and purple toothpaste serum for event-day brightness. If you want deeper whitening, start several days or weeks earlier. What should I avoid before an event to keep teeth white? Avoid coffee, tea, red wine, dark sauces, berries, tobacco, and acidic DIY whitening hacks. Rinse with water after meals and use a straw for staining drinks when possible.
Learn more
PAP+ Teeth Whitening Pen by LaserGlow: The Ultimate Peroxide-Free Gel
PAP+ Teeth Whitening Pen Guide PAP+ Teeth Whitening Pen: Peroxide-Free Whitening for Sensitive Teeth The LaserGlow PAP+ Teeth Whitening Pen is a portable, peroxide-free whitening pen designed for easy touch-ups, surface stains, and sensitive smiles. It uses a brush applicator so you can apply whitening gel directly where you need it, without trays, strips, or complicated routines. Reviewed by David Hanna, RDH · Registered Dental Hygienist PAP+ whitening pen Peroxide-free whitening Sensitive teeth friendly On-the-go touch-ups Shop PAP+ Whitening Pen How to Use It Best For Daily whitening touch-ups, coffee stains, event prep, travel, and people who prefer a peroxide-free whitening option. Product Type Portable teeth whitening pen with built-in brush applicator. Main Benefit Easy, targeted whitening without strips or trays. View Product What Is a PAP+ Teeth Whitening Pen? A PAP+ teeth whitening pen is a portable whitening product that lets you apply whitening gel directly to the teeth using a small built-in brush. PAP stands for phthalimidoperoxycaproic acid, a peroxide-free whitening ingredient used as an alternative to traditional hydrogen peroxide or carbamide peroxide formulas. The LaserGlow PAP+ Teeth Whitening Pen is made for people who want simple, targeted whitening without whitening strips, mouth trays, or LED devices. It is especially useful for quick touch-ups before events, photos, meetings, dates, travel, or anytime your smile needs a little extra help because coffee remains one of humanity’s most delicious stains. Quick answer: The LaserGlow PAP+ Whitening Pen is a peroxide-free, brush-on teeth whitening pen designed to help lift surface stains and support a brighter-looking smile with easy daily touch-ups. Featured Product: LaserGlow PAP+ Teeth Whitening Pen LaserGlow PAP+ Teeth Whitening Pen features a sleek portable design, built-in brush applicator, and peroxide-free PAP+ formula for easy whitening touch-ups at home or on the go. Shop PAP+ Whitening Pen Why Choose a Peroxide-Free Whitening Pen? Traditional whitening products often use hydrogen peroxide or carbamide peroxide. These ingredients can be effective, but some people experience temporary sensitivity or gum irritation when using peroxide whitening products, especially if they overuse them or already have sensitive teeth. A peroxide-free whitening pen gives users another option. PAP+ whitening is designed for people who want stain-lifting support without relying on peroxide-based bleaching gels. No Hydrogen Peroxide A peroxide-free formula for people who prefer a gentler whitening approach. Designed for Sensitive Smiles A smart option for users who want whitening support without traditional peroxide gels. Easy Brush-On Application Paint the gel directly onto the visible teeth you want to brighten. Great for Touch-Ups Use before photos, events, travel, meetings, or after stain-heavy routines. Important: Peroxide-free does not mean instant permanent whitening. Results vary based on starting tooth shade, stain type, diet, oral hygiene, and consistency. Annoying, yes. Also true. How the LaserGlow PAP+ Whitening Pen Works The LaserGlow PAP+ Whitening Pen uses a brush-on gel to help target visible tooth stains. The applicator lets you coat the front surfaces of the teeth evenly, including areas that strips may not cover as precisely. The formula is designed for cosmetic whitening touch-ups and stain maintenance. It is best used on natural teeth. Like all whitening products, it will not change the base color of crowns, veneers, fillings, bonding, or other restorations. Best use: Use the PAP+ pen for natural teeth, visible smile-zone stains, and easy maintenance between deeper whitening routines or professional whitening appointments. Built-In Brush Applicator for Targeted Whitening One of the biggest benefits of a whitening pen is control. Instead of trying to keep slippery strips in place, you can apply the gel with a built-in brush directly onto the teeth you want to treat. Why the brush design matters Helps target visible teeth in the smile zone. Allows more precise application than strips. Works well for quick touch-ups before events. Fits easily in a purse, travel bag, desk drawer, or bathroom routine. Does not require trays, molds, syringes, or LED lights. It is whitening without the little plastic strip ceremony. Society may recover. How to Use the LaserGlow PAP+ Teeth Whitening Pen Always follow the product directions on your packaging. For best results, start with clean teeth and use a thin, even layer. More gel does not mean better results. It usually just means messier teeth and misplaced optimism. Brush first: Start with clean teeth so the gel can contact the tooth surface. Dry your teeth: Gently pat the visible teeth dry with a tissue if needed. Click the pen: Twist or click until a small amount of gel appears on the brush. Apply a thin layer: Brush the gel onto the front surfaces of the teeth you want to whiten. Avoid gums and lips: Keep the gel focused on the tooth surface. Let it set: Keep lips away from teeth briefly so the gel can settle. Avoid food and drinks: Wait before eating or drinking so the formula has time to work. Repeat as directed: Use consistently based on your product instructions and comfort level. Shop PAP+ Whitening Pen PAP+ Whitening Pen vs Other Teeth Whitening Options The right whitening method depends on your goals. A PAP+ pen is not trying to replace every whitening product. It is best for convenience, touch-ups, and peroxide-free cosmetic whitening. Whitening Option Best For What to Know PAP+ Whitening Pen Peroxide-free touch-ups, targeted application, sensitive smiles. Easy brush-on use. Best for natural teeth and surface stain maintenance. Whitening Strips At-home whitening routines. Can be effective but may be less precise and may cause sensitivity for some users. Wireless LED Whitening Kit Structured at-home whitening. Useful for a guided whitening routine with LED support and whitening gel. Purple Toothpaste Instant cosmetic color correction. Temporarily helps neutralize yellow tones but does not bleach enamel. In-Office Whitening Faster professional whitening results. Best for clients who want a stronger provider-controlled treatment. Who Is the PAP+ Whitening Pen Best For? The LaserGlow PAP+ Whitening Pen is best for people who want easy whitening maintenance without committing to a full tray, strip, or LED routine every time. It may be a good fit if you want: A peroxide-free whitening option. A whitening pen for sensitive teeth. A portable product for travel or work. A quick touch-up before photos, meetings, dates, or events. A brush applicator for targeted application. A whitening product that does not require strips or trays. It may not be ideal if: You expect crowns, veneers, bonding, or fillings to whiten. You have untreated cavities, gum disease, or tooth pain. You want the fastest possible dramatic change in one appointment. You are looking for a replacement for professional dental care. Realistic expectation: This is a cosmetic whitening pen for natural teeth and stain maintenance. It is not a magic marker for dental restorations. Sadly, porcelain does not care about our dreams. Can You Use a PAP+ Whitening Pen on Veneers, Crowns, or Bonding? You can usually apply a non-abrasive whitening pen around dental work without expecting damage, but whitening products do not change the internal shade of veneers, crowns, fillings, bonding, or other restorations. They may help clean or reduce surface stains, but they will not make artificial dental materials whiter than their original shade. If your natural teeth are whitening but your restorations are not, the color difference can become more noticeable. If you have visible cosmetic dental work, speak with your dentist before starting a whitening routine. Read: Can You Whiten Veneers? How to Maintain Results After Using a Whitening Pen Whitening works best when your daily habits support the results. If you whiten and immediately return to coffee, red wine, berries, and dark sauces without rinsing or brushing, your teeth will continue collecting stains because apparently snacks also have ambition. Brush twice daily. Floss daily to reduce stain-trapping plaque. Rinse with water after coffee, tea, wine, or dark foods. Use a straw for iced coffee or tea when possible. Avoid smoking and vaping if you want long-term brightness. Use Purple Toothpaste for temporary color correction before events. Use whitening strips or an LED kit for a more structured routine if needed. Shop Purple Toothpaste Shop Whitening Strips PAP+ Teeth Whitening Pen FAQ What is a PAP+ teeth whitening pen? A PAP+ teeth whitening pen is a portable whitening product that uses a brush applicator to apply peroxide-free whitening gel directly to natural teeth. It is designed for easy touch-ups and surface stain maintenance. Is the LaserGlow PAP+ Whitening Pen peroxide-free? Yes. The LaserGlow PAP+ Whitening Pen is a peroxide-free whitening pen designed for users who want an alternative to traditional hydrogen peroxide or carbamide peroxide whitening products. Is a PAP+ whitening pen good for sensitive teeth? A PAP+ whitening pen can be a good option for people who prefer a peroxide-free whitening product. If you have severe sensitivity, cavities, gum recession, or dental pain, speak with a dentist before whitening. How fast does the PAP+ Whitening Pen work? Some users may notice a brighter-looking smile after early use, but results vary. Consistency, starting shade, stain type, diet, and oral hygiene all affect whitening results. Can I use the PAP+ Whitening Pen every day? Use the pen according to the directions on your product packaging. Daily use may be appropriate for some users, but you should stop if irritation occurs and speak with a dental professional if sensitivity persists. Does the PAP+ Whitening Pen work on crowns or veneers? No whitening pen can change the internal shade of crowns, veneers, fillings, bonding, or other restorations. It may help remove surface stains, but artificial dental materials will not whiten beyond their original shade. Do I need an LED light with the PAP+ Whitening Pen? No. The PAP+ Whitening Pen is designed as a brush-on whitening product and does not require an LED light. If you want a more structured at-home whitening routine, LaserGlow also offers LED whitening kits. Whiten Anywhere with LaserGlow PAP+ Whitening Pen Get a portable, peroxide-free whitening pen designed for sensitive smiles, surface stains, and easy on-the-go touch-ups. Shop PAP+ Whitening Pen Shop Oral Care Main Product Portable peroxide-free whitening pen with built-in brush applicator for quick touch-ups. Shop PAP+ Whitening Pen Best For Peroxide-free whitening Sensitive smiles Coffee stains Quick touch-ups Travel and events No strips or trays Recommended Products PAP+ Whitening Pen Purple Toothpaste Teeth Whitening Strips Wireless LED Whitening Kit All Oral Care Recommended Articles Best Teeth Whitening for Sensitive Teeth Teeth Whitening Strips Review Foods That Stain Teeth After Whitening Does Purple Toothpaste Work?
Learn more
How to Remove Tooth Gems Safely: Professional Removal Guide
Tooth gem removal should be done professionally — not pried or picked off at home. This guide explains the six-step professional process, what DIY removal risks to enamel, when to refer to a dentist, and how to use the correct removal tool.
Learn moreTooth Gem Glue: What to Use, How to Apply It & How to Remove It
Tooth Gem Application · Professional Guide Tooth gems are small crystals bonded to the enamel surface using a dental-grade adhesive and cured with an LED curing light — no drilling, no injections, completely reversible. This guide covers what tooth gems are, how the full application process works step by step, which professional kit components you need, safety and enamel considerations, aftercare instructions, and how to remove tooth gems safely. Medically reviewed by David Hanna, RDH — Registered Dental Hygienist · Updated April 28, 2026 · Published by LaserGlow Download Free PDF Guide Tooth Gem Resource Center Shop Kits & Supplies ProcedureNon-invasive · Reversible Application time≈ 15–20 min per gem Longevity6–12 months typical Overview What are tooth gems? A cosmetic, enamel-safe way to add sparkle to a smile using the same bonding chemistry as orthodontic brackets. Tooth gems are tiny decorative crystals or jewels bonded to the outer enamel as a form of cosmetic smile jewelry. The procedure is completely non-invasive — no drilling, no injections, and no permanent alteration of tooth structure. A dental-grade adhesive is applied to a clean, etched enamel surface, the gem is placed, and the bond is cured with a blue LED light in the same way orthodontic brackets and composite restorations are bonded. When performed correctly with professional materials, tooth gem application is painless, requires no anesthesia, and can be reversed without damaging healthy enamel. LaserGlow supplies premium crystal tooth gems, butterfly designs, heart gems, and complete professional tooth gem kits for trained technicians, whitening studios, and dental professionals. Professional kit Inside a professional tooth gem kit Every component is dental-grade and selected to support strong, predictable adhesion — not just aesthetics. Step 1 · Enamel Prep Etching gel A mild phosphoric acid gel lightly etches the enamel surface, creating micro-roughness so resin can lock in. Applied for 15–20 seconds, then rinsed thoroughly and dried completely. Step 2 · Base Layer Bonding agent A light-cured bonding resin penetrates etched enamel to form a strong, tacky adhesive base. Using a quality dental bonding agent is critical for long-lasting results. Step 3 · Adhesion Dental adhesive / composite Clear, light-curing orthodontic-style composite resin secures the gem to the tooth. Only dental-grade materials designed for intraoral use should be used — never super glue or nail glue. The sparkle Tooth gems High-brilliance flat-back crystals (commonly 1.8 mm or 2.2 mm) with reflective backings that catch light. Available in singles, clusters, butterflies, hearts, and more. Shop crystal tooth gems → Curing LED curing light A high-intensity dental LED light polymerizes the bond and composite under the gem, locking it securely in place within seconds. Correct angle and distance matter. LaserGlow LED curing light → Precision Wax applicator tool A wax-tipped applicator picks up and places tiny gems accurately without slipping, making it easier to center crystals on the tooth for clean, symmetrical results. Tooth gem wax applicator → For an all-in-one professional setup, start with the LaserGlow Professional Tooth Gem Kit and browse the full Tooth Gem Kits & Supplies collection. Clinical workflow How to apply tooth gems: step-by-step Follow this protocol with dental-grade materials and proper isolation for predictable, enamel-safe results. Step Goal Timing Key note Prep Clean & dry field 30–60 s Polish, rinse, isolate. No oils or fluoride immediately prior. Etch Micromechanical retention ~20 s Rinse & dry to a chalky matte surface. Bond Adhesive interface 10–20 s Thin, even layer — no pooling at margins. Place Precise gem position — Verify symmetry and alignment before curing. Cure Polymerization 20–40 s Multiple angles; protect soft tissue; confirm full set. Seal Margin protection 10–20 s Thin coat; wipe oxygen-inhibited layer if needed. 1 Client prep and isolation Have the client brush and floss before the appointment. Select the target tooth — upper incisors and canines are the most common placements. Use cotton rolls or a cheek retractor to keep the area fully dry throughout the entire procedure. Moisture contamination at any stage can compromise the bond. 2 Etch the enamel surface Apply a thin layer of etching gel to the chosen enamel surface for 15–20 seconds, following your product's manufacturer guidelines. Rinse thoroughly for 10–15 seconds, then dry completely until the enamel has a chalky, matte appearance. Proper etching creates the micro-retention needed for a durable bond. 3 Apply the bonding agent Using a fresh microbrush, apply a small amount of bonding resin to the etched area and spread in a thin, even layer. Lightly air-thin if indicated by the manufacturer's instructions. Light-cure with an LED curing light for 10–20 seconds to form a strong adhesive layer before placing the composite. 4 Place a small amount of adhesive and position the gem Apply a controlled, small amount of flowable composite or tooth gem adhesive to the bonded surface. Use the wax applicator tool to pick up the gem by its flat back. Set it precisely on the adhesive, centered where the client wants it, and make any final position adjustments before curing. Thin adhesive layers mean better hold and cleaner margins. 5 Cure from multiple angles Cure with the LED curing light from several different angles for 20–40 seconds total, ensuring the light reaches the composite under and around the gem. Shield surrounding soft tissue during curing. After curing, gently test that the gem is fully locked — there should be zero movement. 6 Final check and margin clean-up Remove any residual wax from the applicator tip and smooth any excess composite around the gem margins if needed. Have the client check the placement and confirm comfort — there should be no sharp edges, high spots, or rough margins. Review aftercare instructions before the client leaves. Enamel safety Are tooth gems safe? Safety and best practices When applied and removed correctly with professional materials, tooth gems can be enamel-safe and reversible. The risks come from poor technique and non-dental materials — not from the gem itself. Tooth gems applied with professional, dental-grade adhesive and correct technique are a safe cosmetic service. The key is to respect enamel integrity, use only intraoral-approved materials, and maintain excellent oral hygiene around the gem site. Never use super glue, nail glue, or any adhesive not specifically designed for intraoral use. ✓ Use only dental-grade or jewelry adhesives formulated for intraoral use. ✓ Keep adhesive away from gum tissue and soft tissue margins to prevent irritation. ✓ Do not bond over worn, decayed, cracked, or compromised enamel — assess tooth health first. ✓ Use single-use applicators and strict infection control protocols between clients. ✓ Obtain informed consent covering longevity, maintenance, and removal expectations. Tooth gems are temporary and may need replacement or removal after 6–12 months depending on the client's habits, diet, oral hygiene, and the quality of the original application. With proper informed consent and consistent aftercare guidance, the risk of enamel damage or plaque accumulation around the gem site is significantly reduced. For removal, always use professional instruments and controlled polishing to remove adhesive residue — never pry or force the gem off. See the full tooth gem removal guide in the Tooth Gem Resource Center, and explore the professional removal tool from LaserGlow. Post-care Tooth gem aftercare and removal Educate every client on how to protect their enamel and extend the life of their tooth gem before they leave the chair. Client checklist Aftercare instructions Avoid sticky, chewy, or hard foods for the first 24–48 hours. Do not pick at or bite directly on the gem. Brush gently with a soft-bristled toothbrush twice daily. Floss carefully around the gem site to prevent plaque buildup. Avoid whitening strips directly over the gem area. Have the gem checked at regular dental visits. If the gem loosens or falls off, do not attempt to re-glue at home — contact your provider. Full aftercare guide → For professionals Safe removal Tooth gem removal should always be performed by a trained professional. Use a dental handpiece with appropriate bits and polishing steps to remove the adhesive while preserving enamel. Avoid forcefully prying off the gem — this can chip or scratch enamel. A well-applied gem should lift cleanly with controlled mechanical polishing and finishing burs. After removal, polish the enamel surface smooth and advise the client on enamel care. View tooth gem removal guide → FAQ Tooth gem application FAQs Common questions from clients and professionals about tooth gem application, longevity, safety, and removal. How long do tooth gems last?Tap to expandTooth gems typically last 6–12 months when applied with professional dental-grade materials and maintained with good oral hygiene. Longevity depends on the client's diet, bite habits, how carefully they follow aftercare instructions, and the quality of the original application technique. Will a tooth gem damage my enamel?Tap to expandWhen applied and removed correctly by a trained professional using dental-grade products, tooth gems should not damage healthy enamel. The main risks come from DIY kits using non-dental glues, or aggressive removal methods such as prying, which can cause scratches or enamel loss. Can I brush my teeth with a tooth gem?Tap to expandYes. Clients should continue brushing twice daily with a soft-bristled toothbrush. Avoid scrubbing aggressively directly over the gem. Keeping the area around the gem very clean is important to prevent plaque buildup and potential gum irritation. What should I do if the tooth gem falls off?Tap to expandIf a gem falls off prematurely, save it if possible and contact your tooth gem provider or dental professional to have it reapplied. Never attempt to re-glue the gem at home with non-dental adhesives — this can damage enamel and irritate soft tissue. Can I remove a tooth gem at home?Tap to expandHome removal is not recommended. Safe removal should be performed by a dental professional or trained tooth gem technician using controlled polishing and finishing techniques to remove the adhesive without harming the enamel surface. Is tooth gem application painful?Tap to expandNo. Tooth gem application is completely non-invasive and does not require drilling or anesthesia. Most clients only feel light pressure during gem placement. The procedure is generally quick and comfortable when performed by a trained provider. Are there any side effects?Tap to expandSide effects are rare when proper materials and technique are used. The primary concerns are plaque accumulation around the gem margins and mild gum irritation if adhesive contacts soft tissue. Good client hygiene habits and correct placement technique significantly reduce these risks. Who should not get tooth gems?Tap to expandTooth gems are not recommended for teeth with active decay, existing cracks, significant enamel wear, or teeth that have had extensive restorative work in the placement area. Clients with orthodontic brackets on the target tooth, known allergies to dental bonding materials, or certain bite patterns that create direct force on the gem site may also not be good candidates. Build a complete tooth gem service Combine professional training, dental-grade supplies, and clear aftercare instructions to add a high-margin, in-demand cosmetic service to your practice or studio. Download Free Tooth Gem PDF Tooth Gem Resource Hub Shop Tooth Gem Collection Related guides & recommended pro tools Stay in the tooth gem cluster, then find the exact kit, crystal, or tool you need for clean, consistent results. Related guides Application Tooth Gem Application Guide Full bonding workflow, curing times, placement technique, and what affects hold time. Read application Removal How to Remove Tooth Gems Safely The correct removal method to protect enamel and clear adhesive residue properly. Read removal Longevity How Long Do Tooth Gems Last? Realistic longevity ranges plus the aftercare habits that prevent early pop-offs. Read longevity Tools used (shop) Essentials Etch + Bond + Glue Kit Proper enamel prep and dental-grade bonding. This is the "stay on" part. Shop essentials Gems Premium Crystal Tooth Gems Clean edges, better comfort, and more reliable finish — crystals, butterflies, hearts. Shop crystals Removal Tooth Gem Removal Tool Professional removal without drama. No prying. No chipped enamel. Shop removal tool Business Tooth Gem Business Starter Kit A complete professional setup for consistent results and efficient client workflows. Shop starter kit Professional note: never use nail glue or consumer adhesives for tooth gem application. Correct prep + correct cure + dental-grade materials = enamel-safe, lasting results.
Learn more
Cold Sore Red Light Therapy: How It Works, When to Use It & What to Expect
Zap cold sores at the first tingle with LaserGlow’s portable red‑light therapy device—drug‑free, UV‑free relief that halves healing time and keeps your smile camera‑ready.
Learn moreTooth Gem Applicator Tool: How to Pick Up and Place Gems Without Slipping
A wax tip tooth gem applicator prevents gem slippage during placement and gives you precise control over crystals, butterflies, and designer shapes — here's how to use one correctly.
Learn more
Can You Whiten Teeth While Pregnant? | LaserGlow
Pregnancy Safety · Client Guidance · Professional Protocol Professional guidance — David Hanna, RDH Professional whitening should be deferred during pregnancy. This is not because whitening is proven harmful in pregnancy — it's because the current evidence is insufficient to rule out risk, and the treatment is elective. Deferral is the conservative, professionally appropriate recommendation. Here's how to advise clients who ask. By David Hanna, RDH — Registered Dental Hygienist · Updated July 2026 Why Defer The Evidence Client Conversation Alternatives After Delivery FAQ Professional Recommendation Why Professional Whitening Is Deferred During Pregnancy The recommendation to defer whitening during pregnancy comes from a combination of insufficient safety data and the precautionary principle applied to elective cosmetic procedures during pregnancy. Professional dental and medical organizations consistently recommend deferral — not because whitening is known to harm pregnancy outcomes, but because: There are no adequate controlled studies on professional HP whitening during pregnancy. Research is primarily animal studies and case series — not the standard required to confirm safety in pregnant humans. Hydrogen peroxide is absorbed systemically in small amounts during whitening. The effect on fetal development at professional HP concentrations has not been adequately studied. The procedure is elective — teeth whitening is not medically necessary. When a procedure is elective and safety data is absent, deferral until the exposure can be eliminated (post-delivery) is the correct clinical default. First trimester sensitivity — early pregnancy is the most critical period of fetal development and is also when nausea makes dental procedures less tolerable. Even providers who would consider whitening in the second trimester typically recommend against it in the first. Note for providers: The recommendation is deferral, not alarm. If a client had whitening before they knew they were pregnant, this does not represent a cause for concern — there is no documented evidence of harm from incidental whitening in early pregnancy. The recommendation is precautionary for planned procedures, not a retrospective safety warning. What the Evidence Actually Shows The Research on Whitening During Pregnancy Professional dental organizations (including the American Dental Association) recommend deferring whitening during pregnancy — not because harm has been established, but because the research necessary to establish safety hasn't been conducted. What the available evidence shows: In vitro and animal studies suggest potential for HP-related effects at high concentrations — but these studies don't translate directly to clinical use in humans at professional whitening doses No published controlled clinical trials exist demonstrating either safety or harm from professional whitening during pregnancy in humans Low-concentration HP products used briefly (like some toothpastes with trace HP) have not been associated with adverse pregnancy outcomes, but these are very different from professional whitening concentrations Saliva and oral mucosa absorb some HP during whitening — the systemic absorption rate and any fetal exposure at professional whitening concentrations hasn't been quantified in clinical settings The research gap is the reason for deferral — not a body of evidence establishing harm. This distinction matters for how you communicate with clients. Client Communication How to Advise Pregnant Clients Who Ask About Whitening Pregnant clients who ask about whitening deserve an honest, non-alarmist answer that reflects the actual evidence — not an exaggerated warning or a dismissive "it's probably fine." What to say "Professional whitening is something we defer during pregnancy — not because we know it's harmful, but because the research to confirm safety hasn't been done. Whitening is an elective treatment, and when a procedure is elective and the data is incomplete, the cautious recommendation is to wait until after delivery. There's no concern about whitening you may have had before finding out you were pregnant." What not to say Don't say "whitening is dangerous during pregnancy" — the evidence doesn't support that statement Don't say "it's probably fine, we just say this to be safe" — this dismisses a legitimate clinical caution Don't suggest OTC consumer whitening products as a pregnancy-safe alternative — they carry the same precautionary limitation as professional whitening Alternatives During Pregnancy What Pregnant Clients Can Use for Smile Brightness Clients who want to maintain or improve smile brightness during pregnancy have safe, non-peroxide options: Mechanical cleaning Professional dental cleaning removes surface staining safely during pregnancy. Regular cleanings are recommended throughout pregnancy and maintain brightness without HP exposure. Whitening toothpaste Fluoride-based whitening toothpastes that rely on mild abrasives rather than HP are appropriate during pregnancy. Look for ADA-approved options. These address surface staining only. Purple color corrector Purple color corrector toothpaste neutralizes yellow tones optically on contact. No HP, no whitening chemistry — purely optical. Safe to use during pregnancy. Plan professional whitening post-delivery Set the appointment for after delivery and after nursing, if applicable. Frame the conversation as "let's plan this for after the baby" rather than "you can't have this." After Delivery When Can Professional Whitening Resume After Pregnancy? After delivery, professional whitening can resume once: The client is no longer pregnant — the deferral applies to pregnancy, not postpartum period in general If nursing: Some providers recommend waiting until nursing is complete as an additional precaution — HP absorbed during whitening passes into breast milk in small amounts. The evidence on clinical significance is limited, but nursing clients who want to be conservative should discuss timing with their physician. This is a preference-based conversation, not a firm contraindication like pregnancy itself. The client's teeth and gums are in good health — post-delivery hormonal changes can affect gum health. A dental screening before whitening post-pregnancy is good practice. Good news for clients: Pregnancy-related hormonal changes can sometimes make teeth temporarily more sensitive. Post-delivery, when hormones normalize and the whitening is actually scheduled, sensitivity is often lower than clients fear. Many clients find post-pregnancy whitening very comfortable with 16% or 25% HP. FAQ Whitening During Pregnancy FAQ Can you whiten your teeth while pregnant? Professional dental guidance recommends deferring professional teeth whitening during pregnancy. The recommendation is precautionary — not because whitening is proven harmful in pregnancy, but because adequate safety data for professional HP whitening during pregnancy doesn't exist, and the procedure is elective. Wait until after delivery. Is teeth whitening safe in the second trimester? The professional recommendation is to defer whitening for all three trimesters, not just the first. While the first trimester is considered the most critical for fetal development, the absence of safety data applies throughout pregnancy. Some providers apply individual clinical judgment in the second trimester in consultation with the client's physician, but the blanket recommendation is deferral until post-delivery. What happens if I whitened my teeth before I knew I was pregnant? Incidental whitening before learning of pregnancy is not a cause for concern. There is no documented evidence that brief, early exposure to professional whitening gel causes harm to pregnancy outcomes. The deferral recommendation is for planned future whitening, not a retrospective warning about past exposure. Discuss any concerns with your obstetrician if needed for reassurance. Can I use whitening toothpaste while pregnant? Fluoride-based whitening toothpastes that use mild abrasives rather than HP are generally considered appropriate during pregnancy. ADA-approved fluoride toothpaste is recommended for all adults including during pregnancy. Toothpastes with trace HP concentrations are not the same category as professional whitening gels — the exposure is minimal and transient. When in doubt, a non-HP whitening toothpaste or a standard fluoride toothpaste avoids the question entirely. Is whitening safe while breastfeeding? HP whitening while nursing is a separate consideration from pregnancy. HP absorbed during whitening passes into breast milk in small amounts. Clinical evidence on significance is limited. Some providers apply the same deferral to breastfeeding; others consider it acceptable with the client's informed decision in consultation with their physician. Unlike during pregnancy, this is a clinical judgment conversation rather than a uniform professional recommendation for deferral. Related Safety Resources Safety Guide Does It Damage Enamel? All HP Gels Shade Maintenance Gel Strength Guide Shop Gels
Learn more
Online Teeth Whitening Course & Training: Start Your Whitening Business with LaserGlow
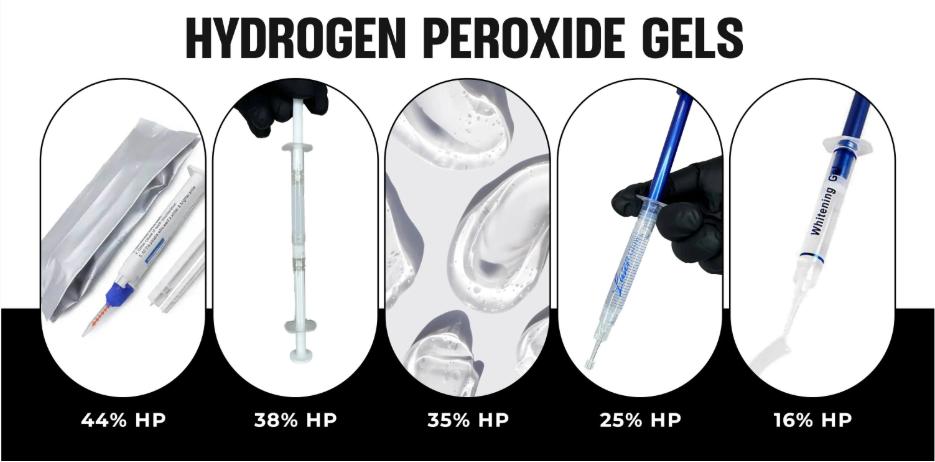
Online Teeth Whitening Training Online Teeth Whitening Course & Training: Start Your Whitening Business with LaserGlow Learn professional teeth whitening from home with LaserGlow’s online teeth whitening course. Get step-by-step PDF training, HD video lessons, whitening protocols, safety guidance, business setup help, marketing basics, wholesale access, and optional starter kit supplies for launching or improving your whitening services. Designed for whitening technicians, med-spa owners, salons, beauty professionals, dental teams, and entrepreneurs Enroll in Teeth Whitening Course Compare Course Options The Fast Answer: What Is LaserGlow’s Teeth Whitening Course? LaserGlow’s online teeth whitening course is a digital training program built for people who want to learn how to perform cosmetic teeth whitening safely, professionally, and confidently. The course includes a detailed training PDF, HD video lessons, client protocol guidance, whitening gel education, safety and aftercare steps, business setup tips, marketing basics, wholesale pricing access, and lifetime support. In plain language: you get the training, the business foundation, and the supply access in one place instead of trying to piece it together from random internet opinions, which is how civilization keeps inventing preventable problems. Who Is This Teeth Whitening Training For? Whitening Technicians Learn professional whitening protocols, client screening, gel handling, and aftercare guidance. Med-Spas & Salons Add cosmetic teeth whitening as a premium service or appointment upgrade. Beauty Entrepreneurs Build a whitening business with training, supplies, pricing guidance, and marketing basics. Dental & Aesthetic Teams Use the course to support team education, service consistency, and treatment confidence. What You Learn Inside the Course Training Module What It Covers Why It Matters Whitening Science How hydrogen peroxide, carbamide peroxide, PAP+, stain types, and light activation work Helps you understand what products do instead of blindly applying gel and hoping for a miracle Client Screening Sensitivity, restorations, gum health, contraindications, expectations, and consent Helps protect clients and your business before treatment begins Professional Protocol Cheek retractors, gum protection, gel placement, timing, shade checks, and cleanup Creates a repeatable service instead of improvising like a caffeinated raccoon Gingival Barrier & Safety Soft-tissue isolation, barrier placement, curing, and avoiding gum irritation Important when working with professional whitening gels and sensitive oral tissues Common Mistakes Patchy results, sensitivity complaints, gum blanching, uneven gel, and poor aftercare Helps you prevent the problems beginners usually learn the hard way Aftercare Post-whitening diet, sensitivity support, client instructions, and maintenance products Improves client experience and helps results last longer Business Setup Pricing, service menu, add-ons, memberships, photos, forms, and client flow Helps turn the treatment into a real service, not just a product in a drawer Marketing Basics Google Ads, local SEO, Instagram content, influencer outreach, and before-and-after photos Helps you attract clients instead of waiting for the universe to send bookings out of pity Inside the Master Training PDF The Master PDF gives you a complete written training foundation that you can study, reference, and revisit while building your teeth whitening service. Whitening Basics Understand tooth stains, enamel structure, peroxide chemistry, and shade expectations. Gel Concentrations Learn the difference between 16%, 25%, 35%, 44% HP, carbamide peroxide, and peroxide-free options. Chairside Workflow Follow step-by-step treatment flow from client intake to final shade check. Aftercare Instructions Give clients clear post-treatment guidance for sensitivity, staining foods, and maintenance. HD Video Training Library The HD video library helps visual learners see the process instead of trying to decode every movement from text alone. You can pause, rewind, and review the technique before practicing. Procedure Walkthroughs See the treatment flow from setup to cleanup. Close-Up Application Review gel placement, isolation, and treatment positioning. Client Communication Learn how to explain expectations, aftercare, and sensitivity. Error Prevention Understand how to avoid common beginner mistakes before they happen. Choose Your Teeth Whitening Course Option Option Price Includes Best For Complete Business Kit $1,600 Course PDF, HD videos, whitening gel syringes, gingival barrier syringes, LED/laser whitening lamp, cheek retractors, vitamin-E swabs, safety goggles, lifetime support, and wholesale access New providers who want training plus supplies to start faster Digital-Only Course $600 Course PDF, HD video library, lifetime support, and wholesale account access Students who already have supplies or want to learn first before ordering equipment Business & Marketing Training Included Learning the whitening protocol is only half the job. You also need clients. The course includes practical business and marketing guidance to help you position your service, price treatments, promote offers, and build local demand. Local SEO Basics Learn how to target searches like “teeth whitening near me” and local service keywords. Google Ads Basics Understand simple campaign structure, high-intent keywords, and appointment-focused ads. Social Media Content Use before-and-after photos, reels, client education, and service demos to build trust. Upsells & Retail Learn how to add take-home products, maintenance kits, and membership offers. Wholesale Pricing and Lifetime Support Course students receive access to LaserGlow wholesale pricing on professional whitening gels, gingival barrier, curing lights, whitening lamps, consumables, and select oral care products. You also receive lifetime support so you can ask questions as your business grows, reorder supplies, improve protocols, and troubleshoot real-world client situations. Safety, Compliance, and Client Aftercare Teeth whitening rules vary by location. Some states, provinces, or countries may restrict who can perform whitening, what peroxide concentrations can be used, and whether dental supervision is required. This course teaches professional best practices, but it is your responsibility to follow local regulations and operate within your legal scope. Annoying? Absolutely. Necessary? Also absolutely. You will learn client screening, consent forms, soft-tissue protection, sensitivity management, post-care guidance, and documentation basics. How to Enroll in the LaserGlow Teeth Whitening Course Visit the LaserGlow Teeth Whitening Course page. Choose Digital-Only or Complete Business Kit. Complete checkout securely online. Receive your digital training materials and course access details. If you choose the kit option, your physical supplies ship with tracking. Study the training, practice your protocol, and prepare your first model session. Why Choose LaserGlow Teeth Whitening Training? Training + Supplies Choose digital education only or bundle training with a complete starter kit. Professional Product Access Get wholesale access to LaserGlow whitening gels, gingival barrier, and supplies. Business-Focused Learn treatment workflow plus pricing, marketing, add-ons, and client retention. Lifetime Support Continue getting help after the course instead of being abandoned with a PDF and vibes. FAQs What is the best online teeth whitening course? The best online teeth whitening course should include whitening science, safety protocols, client screening, gel handling, aftercare, business setup, marketing guidance, and supplier access. LaserGlow’s course combines digital training, HD videos, lifetime support, wholesale access, and an optional starter kit. Do I need a license to start a teeth whitening business? Requirements vary by state, country, and local regulations. Some areas allow non-dental providers to offer cosmetic whitening, while others restrict certain procedures or peroxide concentrations. Always check your local laws before offering services. How long does the LaserGlow teeth whitening course take? Many students can review the core training materials quickly, but you should take time to study the protocol, practice the setup, understand safety steps, and complete model practice before accepting paying clients. What is included in the Complete Business Kit? The Complete Business Kit includes the course PDF, HD videos, whitening gel syringes, gingival barrier syringes, LED/laser whitening lamp, cheek retractors, vitamin-E swabs, safety goggles, lifetime support, and wholesale access. What is included in the Digital-Only Course? The Digital-Only Course includes the training PDF, full HD video library, lifetime support, and wholesale account access. Physical supplies are not included in the digital-only option. Can I buy whitening supplies after taking the course? Yes. Course graduates receive wholesale access to LaserGlow professional whitening supplies and can purchase refills without retaking the course. Can I start a teeth whitening business from home or mobile? Some providers operate from salons, med-spas, home studios, or mobile setups, but rules vary by location. Confirm your local legal requirements, insurance needs, sanitation standards, and business licensing before offering services. Does the course teach marketing? Yes. The course includes business and marketing basics such as pricing, local SEO, Google Ads, social media content, before-and-after photos, service menus, and add-on products. Start Your Teeth Whitening Training Online Build your whitening knowledge, improve your client workflow, and get access to LaserGlow professional supplies. Enroll in the LaserGlow Online Teeth Whitening Course
Learn more